
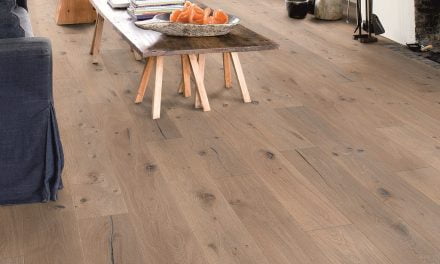
Plywood would have to be one of the decorative timber flooring industry’s quiet achievers. For years it’s been the meat in the sandwich – hidden between the concrete substrate and low profile decorative overlay timber products, or suspended over battens to form a substrate that is flexible and forgiving underfoot. But it would seem that these days low profile timber plank products – which can be used as an overlay (yes, people are actually using plywood as a decorative flooring timber) or underlay (which is often underrated or overlooked) – is installed directly to a concrete substrate. On that note, I think it’s a good time to take a closer look at plywood products and their benefits.
Plywood can be manufactured using various timbers. Of those used, Araucaria (Hoop pine) is popular with Australian manufacturers. Araucaria from sustainably managed plantations tends to be straight grained, making it easier to work with. It sands well and will not taint food. This last one is a good selling point, but as tradies, here are a few other things we would know, should know or could know.
The product is graded A, B, C, D, E and S according to the amount and nature of naturally occurring features appearing on the “face” and or “back” of the board. All grades have permitted imperfections which include filled holes, knots, pin knots, filled splits, roughness, discolouration and glue bleed through. Grade A, being the best quality, might be used for furniture or overlay flooring as it will readily take a stain, clear finish or paint. It’s available in Marine wood, Bond wood and Exterior wood, but unless used as an overlay it’s overkill for flooring. Grades B, C and D are all suitable as a substrate for flooring.
At this point it’s probably a good idea to touch on the other essential element in plywood construction – the adhesive used to bond the layers together.
“Australian standards specify tests for four types of glue bond: types A, B, C and D
Type A: produced from phenolic (PF) resin and forms a permanent glueline that will not deteriorate under wet conditions, heat or cold, eg, used in the manufacture of marine and structural plywoods.
Type B: produced from melamine fortified urea formaldehyde (MUF) resin and is suitable only for limited exposure, eg, form ply, door skins.
Type C & D: produced from urea formaldehyde (UF) resin are both for interior use only, and should not be used in structural applications or wet or damp areas.”
Source: Plywood Association of Australia Ltd
The plywood product most frequently specified for use as a timber flooring underlay is D faced and D backed plywood. Ideally the product will have type A glue bond (as above) and meet AS/NZS2269 Structural Plywood.
This product can be applied over existing tongue and groove flooring or fixed over a concrete slab. While the benefits of applying timber flooring over a ply are equally beneficial, they are without doubt most obvious in the last instance because it minimises or eliminates many of the problems that occur during and post installation – easy to apply vapour barrier, separates flooring from contaminates in the concrete, provides a stable base, improved timber to timber adhesion, fewer drummy spots.
Generally speaking, 12 or 15mm ply is used in domestic installations. Ply can be fixed in place using the glue, glue and nail or nail only option. Application as follows:
- The concrete should be well cured with a moisture content less than 5.5 percent or 75 percent relative humidity.
- the substrate should be free of contaminate and checked for level; deviation not greater than ±3mm within a 3m radius,
- Install vapour barrier 200 microns polyethylene (builder’s plastic) overlapping and taping the joins with a water proof tape, the membrane should be carried 75mm up the wall and trimmed later to the floor height.
- As with all timber flooring, the ply shall be acclimatised, acclimatisation should continue until the installer verifies that the ply has reached equilibrium moisture content which is appropriate for the installation site. The moisture variance between the ply and the timber flooring must be no greater than 2 percent.
- Lay the ply in a brick bond pattern with a 3mm gap between sheets and a 10mm gap around the perimeter adjacent walls and fixed cabinetry.
- Option 1: fix using nylon impact type masonry anchors counter sunk to avoiding anchors sitting proud of the ply surface. Anchors should be spaced at 575mm and 550mm centres with perimeter fixings 50mm in from the edge equating to 3 rows of 5 anchors per 2400 x 1200mm sheet. Power fixings are not to be used as there is a possibility that they may work loose in the future.
- Option 2: (when a vapour barrier has been applied in or directly to the slab or when the plywood is to be used as the decorative surface) run 10mm diameter bead of adhesive at 450mm centres at right angles to the face grain. Fix using nylon impact type masonry anchors; counter sunk to avoiding anchors sitting proud of the ply surface, 300mm from board edge and at 600mm centres
- Option 3: (when a vapour barrier has been applied in or directly to the slab or when the plywood is to be used as the decorative surface) apply adhere directly to the floor using a notched trowel as per the adhesive manufacturers recommendations.
Added note: Ply underlays are not suitable for top fixing of floor boards, as Australian Standard 1684 states the minimum length of nails used should be 2.5 times the thickness of the floor boards. To fix decorative flooring over ply, use a combination of secret nail and adhesive beads at 300 or 450 centres, or my preferred method of full adhesion (check the adhesive spread rate with the adhesive manufacture).
Ply underlays are used in many types of sports floors to give them resilience. Depending on the specified method, for example System SF1 utilises 2 layers of 15mm ply the first layer is laid at 90 degrees in the direction of the court in brick bond pattern while the second layer is glued and stapled at 45 degrees to the first layer also in a brick bond pattern. Prior to installing the ply the concrete substrate shall be sheeted with an impermeable polyethylene membrane and as the single layer method previously mentioned the sheeting shall be overlapped with the joins taped with a water proof tape. The membrane shall be turned up at all perimeters to a minimum height equivalent to the finished floor level.
There are many reasons why ply should be utilised under timber floors. Over concrete it minimises moisture issues and the risk of exposure to contaminants in or on the concrete surface, can eliminate unsightly top nailing and the need to fill holes in timber overlays to provide an aesthetically superior finish. To date I don’t believe we have ever received a request to inspect a floor failure when timber flooring has been correctly installed over a ply underlay.
 Ray and Sharon Brice specialise in mediation training and project management. They have four decades of experience in the flooring industry.
 Ray and Sharon Brice specialise in mediation training and project management. They have four decades of experience in the flooring industry.
 Phone: 0407 591 697
Email: rayandsharon@timbertradenews.com
Photo: Vadim Martynenko/Shutterstock.com


